I’ve been thinking about this the past few days. I never had any expectation of any return to what things were like before, but I guess I hadn’t really internalized the “plan accordingly” part. Funny enough, it’s manifested for me in not being on my bike. I used to commute to an office every day, go running at lunch, participate in meetings, hang out in the work kitchen catching up with people. What I miss the most is that time at the beginning and end of the day, being on my bike – riding hard or easy if I wasn’t feeling it. It was compound fitness. A lot of that time is now replaced with desk time at home.
I was thinking of a club for people who used to commute by bicycle, to meet up in the morning for a short ride, then return to home offices to start the day. I have even considered doing a loop in the morning and ending up at home to shower and get to my first call. Perhaps.
I was just talking to a friend and he said he bought VR goggles and was expounding on riding his smart trainer and lifting. Unsurprisingly, he mentioned he hadn’t left his house in weeks. Strange times indeed.
Plan accordingly. I’m thinking through how to navigate these new times. I’m a fan of healthy habits and I had a lot of them – but circumstances have changed and I need to form new ones.
I think it might be time for some micro-adventures. Maybe some multi-sport bike/run adventures in the neighborhood. 2 weeks ago I grabbed a heavy backpack and hiked 4 miles early in the morning. More creative exploration of healthy habits is what’s needed.
When you lose something, it’s natural to mourn. To sit with the pain and realize THIS is what it means to be human. I don’t know if there will be a general recognition of all the things lost over the past 2 years, but I know it’s healthy to mourn their loss.
There are two ways to wash the dishes. The first is to wash the dishes in order to have clean dishes and the second is to wash the dishes to wash the dishes.
Lately my pull has been toward finishing up major projects. I keep a running to-do list in Notes and only add the next 2 or 3 items I need to do. I woke up Sunday and wanted to make a push to get closer to completion on the portico project. When I’m focused on projects, my running miles plummet. I can’t go for a long run, then eat, change and reset to start working. I’m not sure what fitness value I’m getting from being on my feet for 14 hours, moving back and forth between saws, kneeling down to measure, lifting work pieces and nailing over my head. I can tell you I’m exhausted at the end of the day and the next day my body hurts.
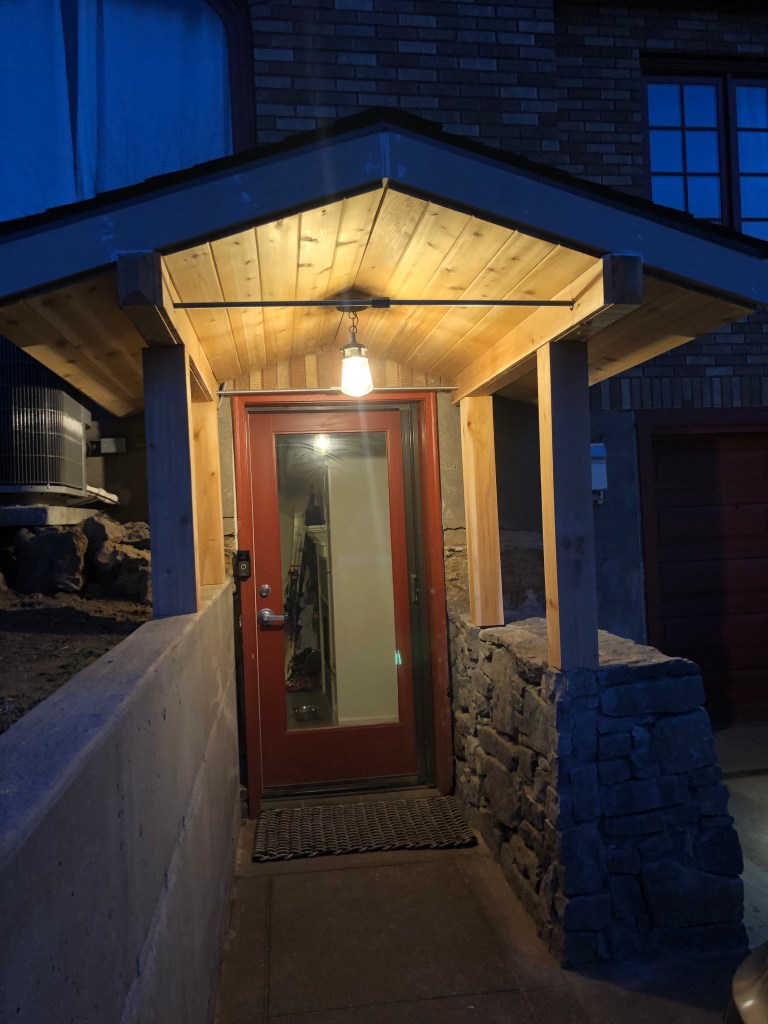
Saturday I wrapped the 4×4 posts in cedar. I could have simply boxed them with 1x boards. but I wanted them to appear solid, with no seams. I mitered the corners by cutting a 45 degree bevel, then glued and nailed 2 pieces together forming a symmetrical L, did the same to the other 2 pieces, then placed them around the post, clamped and nailed them together.
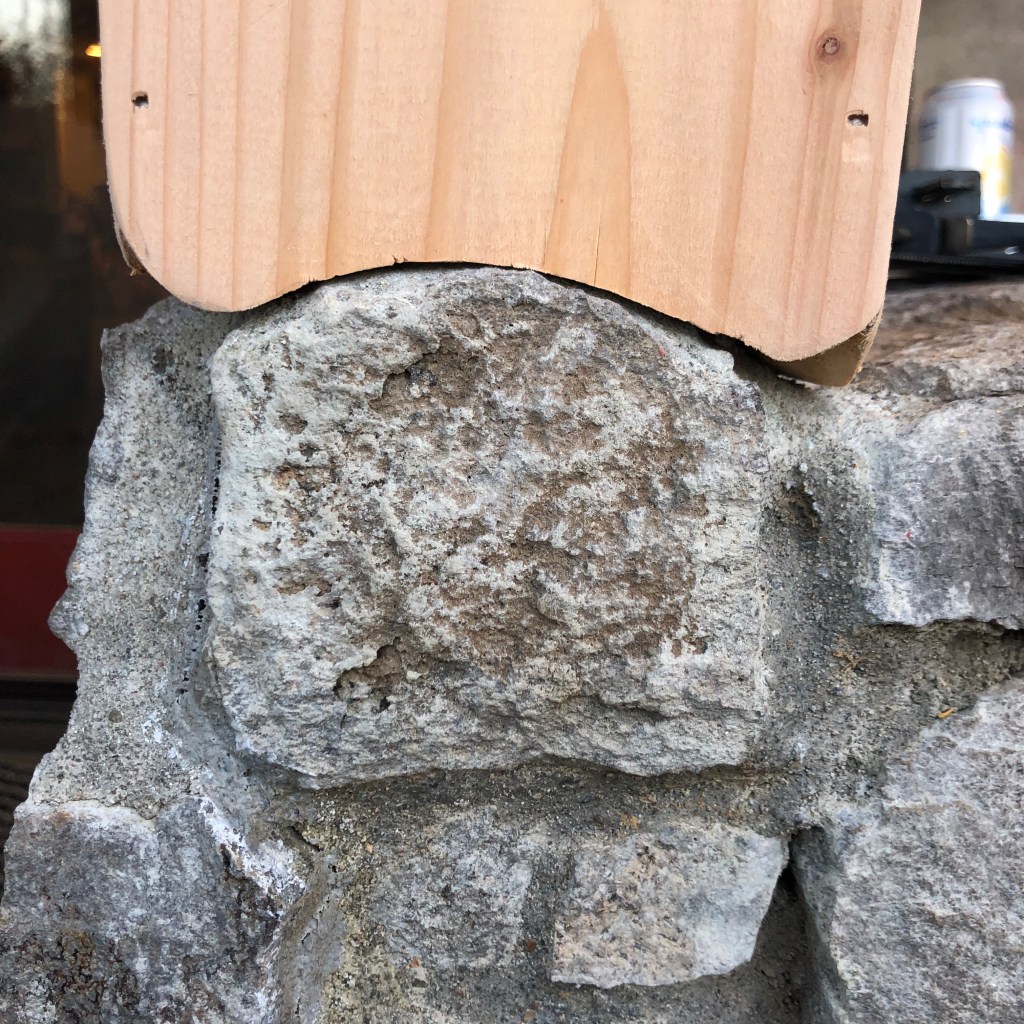
I took care to trim the base of the post around the stone – it’s an aesthetic I’ve taken from Japanese construction where the form of the object flows from one medium to another – in this case, cedar post to stone.
I think about the design process as I’m working. I watched a documentary about Philip Glass years ago and he described the creative process as a river that’s always flowing under the surface, and sometimes he’s able to tap into it. I can only say that I, like many designers – see things that don’t yet exist and set about to make them real. Composers must be able to hear the music before the compose.
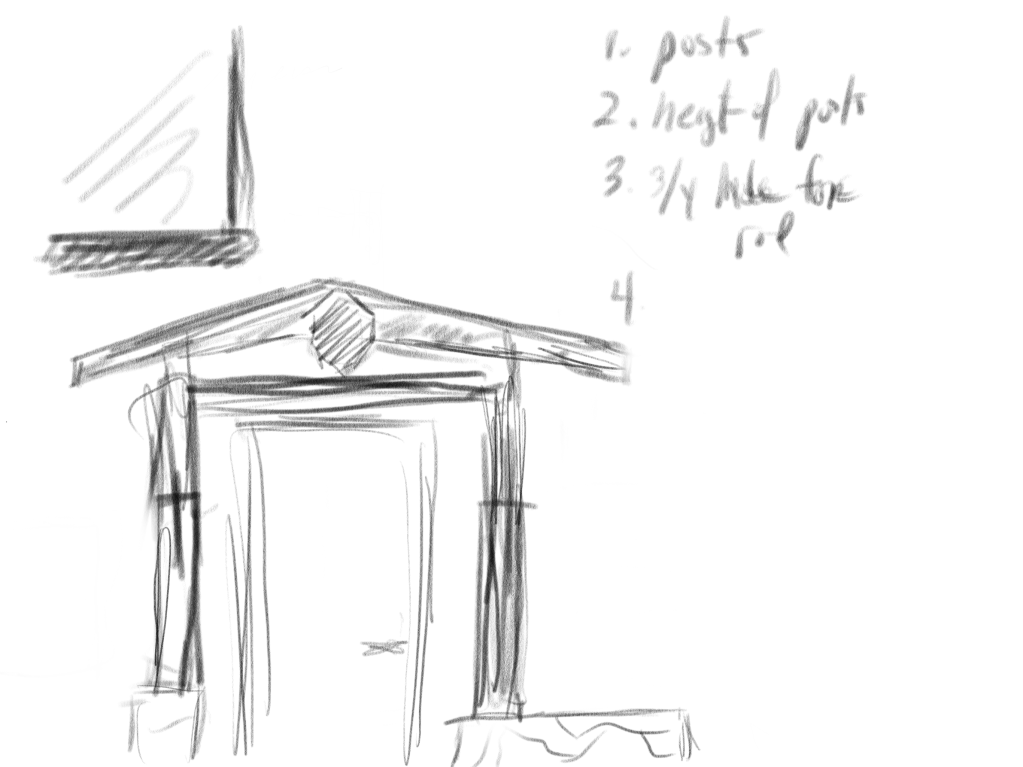
Sketch I made on the iPad before I excavated the base for the stone wall.
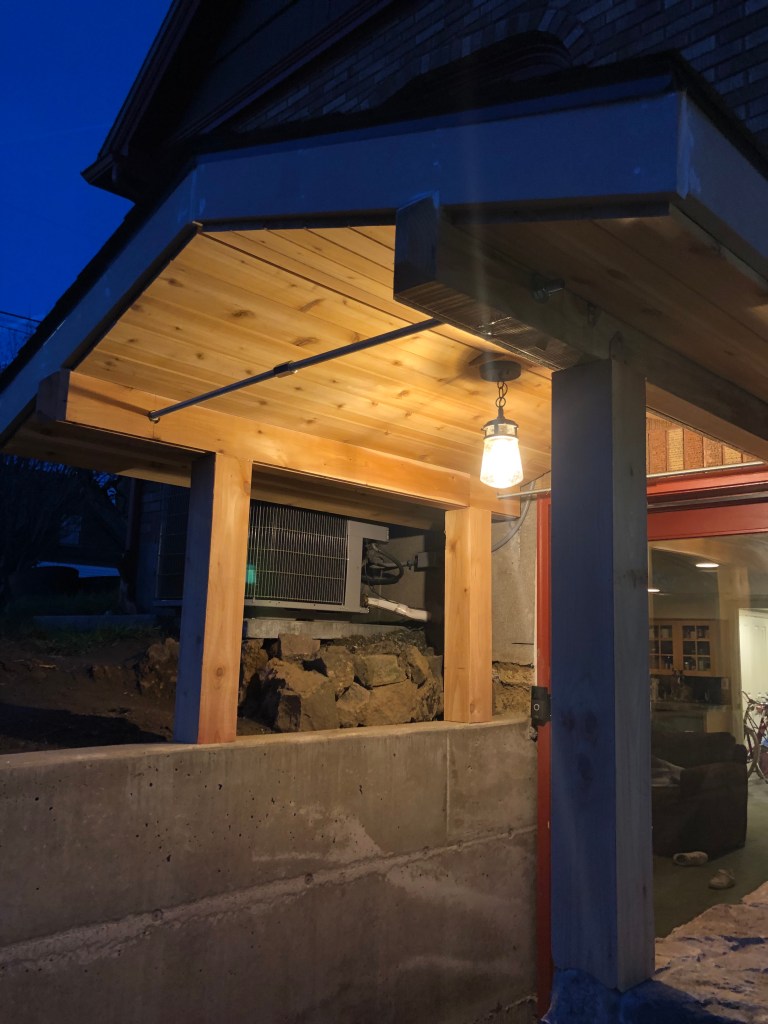
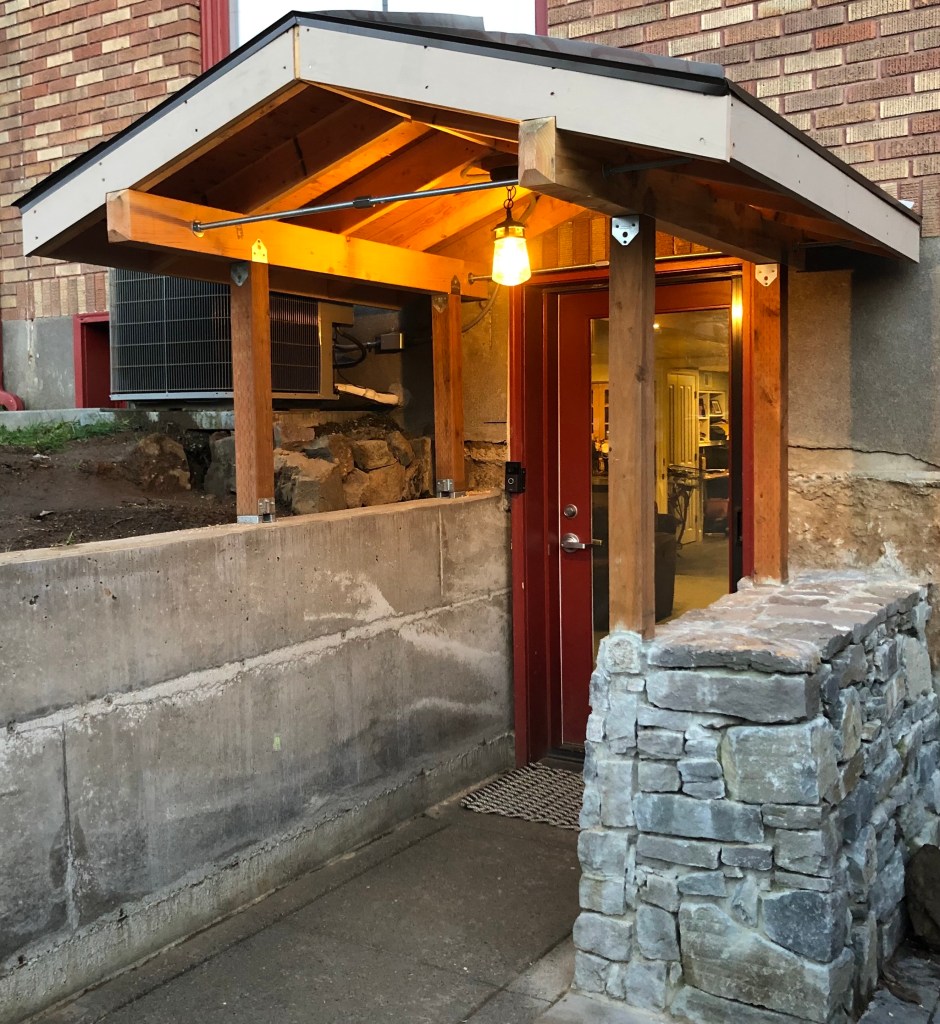
Sunday I set about installing the tongue and groove ceiling. Much of construction is comprised of little tricks you learn as you go and the sequence those tricks are executed. In hindsight, I would have done things in an alternate order – if there’s one trait I have that hinders my work, it’s that I lack patience and move too fast. I miss my long runs, and early ski days, I want to get back to the mountains, but at the same time, I can’t leave projects like this incomplete. So there’s tension. I try to keep in mind that perfection is the enemy of done, and sometimes it’s good to be done.
The most difficult part of this project was the final tongue and groove board at the peak, and cutting the pieces where the light attaches. In these images, there is still a gap at the peak where I’ll cut a piece of trim. I tried to finish this at the end of the day and confidently adjusted my saw to cut a 17 degree bevel on two pieces. When I placed the trim over the gap, I just laughed. It’s not 17 degrees, it’s the opposite. 2 bevel cuts at 163 degrees. I paused for 30 seconds to think through how I could cut 163 degree bevel. The light was fading, I still needed to clean up – it would have to wait for another day.
Remaining to-do:
trim at the peaka
front placard to cover the fascia peak seam (like my sketch)
trim along the front edge. I have 45 degree off cuts from the cedar posts that I’ll use to affix a bevel to the front edge of the fascia. In hindsight, if the tongue and groove was done first, I would have increased the width of the fascia to cover the seam of the tongue and groove. This is what I mean about sequence of events.
paint the fascia
go skiing (I’m going to try and take a couple of weekends off and get outside to play).
Roofers, drywallers, framers, plumbers, flatwork(concrete), finish carpenters, masons, cabinetmakers, tile setters, electricians. I think that’s it. The trades in order of skills required. I only put electricians at the end because I hate doing electrical work. Mostly from renovating old houses and having to deal with ungrounded wiring, knob and tube, asbestos insulated wiring, etc.. And I would never do a job like replacing an entire panel – too easy to make a mistake and get dead.
This weekend I roofed the portico. It’s not particularly skilled labor but doing it well takes patience. Much of building and construction is about thinking through final measurements and then subtracting to some starting point. With framing completed I had to install fascia and drip edge before asphalt shingles. As an amateur – I posit it takes 5x longer to do something… and sometimes longer if what you did needs to be undone/redone. Luckily I didn’t have to redo anything except the underlayment. It’s been exposed to rain for the past 5 weeks and some water had gotten onto the plywood. We had sunny, warm weather so I pulled off all the underlayment and let things dry out in the sun while I cut and installed the fascia and drip edge. Once the plywood was dry, I cut 3 new pieces of material and stapled it on before starting to shingle.
I tend to over-engineer when doing rough work (framing) and think measurements need to be more precise than need be. On a 4/12 roof pitch, the rafters are about 17 degrees, but where a vertical fascia board meets roof line, dimensional lumber is a little bit too wide. I made some test cuts and put a 17 degree bevel on the fascia with the track saw so that it would tuck right up below roof line. It fit perfectly, but in the end I realized if I leave a 90 degree edge, the space between the edge of the fascia and roofline will make a nice little 17 degree inside corner and fascia will match the roof perfectly. The bevel is unnecessary.
I rented a coil nailer from the local home depot which made quick work of fixing the shingles. I never run my nail guns on auto (holding the trigger and just pressing the tip shoots the nail), but with roofing, it’s way faster to shoot 5-6 quick nails. It’s the sound of working being done. The nail gun firing and the kick of the compressor. Starting with a half shingle and overlapping the drip edge by 1/4 inch, I put a starting border across the more difficult to access side of the roof. The portico roof is 84 inches long and a shingle is 40 inches long. With the overlap required front and back, 2 shingles won’t cover the roof, so I had to split shingles into 3rd’s in order not to leave short runs.
I roofed one side to the ridge, leaving half a shingle overlapping the ridge beam – I wasn’t sure how I was going to connect to the other side, but would decide once I completed the other side. There is a particular nailing pattern provided on the packaging by the manufacturer. It must be related to wind shear and/or water penetration of the shingle. I followed the nailing pattern for all the shingles and brought the other side up to the ridge line. I was able to wrap one side over the other to create a watertight covering over the ridge and then began to cap the ridge.
Common practice is to begin capping the ridge on the opposite side of the prevailing weather, the establishes an overlap of shingles that prevent high winds from lifting a shingle and pulling the roof off the structure. I think this was the most enjoyable part of the project. I cut 12 inch shingles, measuring as to keep a single flexible surface at 6 inches where the shingle would bend over the ridge line. I finished the last shingle on the west side of the roof, shot in 4 nails (the last 4 are exposed as there are no more shingles to overlap) and then caulked over the nail heads with silicon. I’ll check on the silicon in the spring and reapply or get some roofing tar to keep those nails covered.
That’s how to shingle a portico.
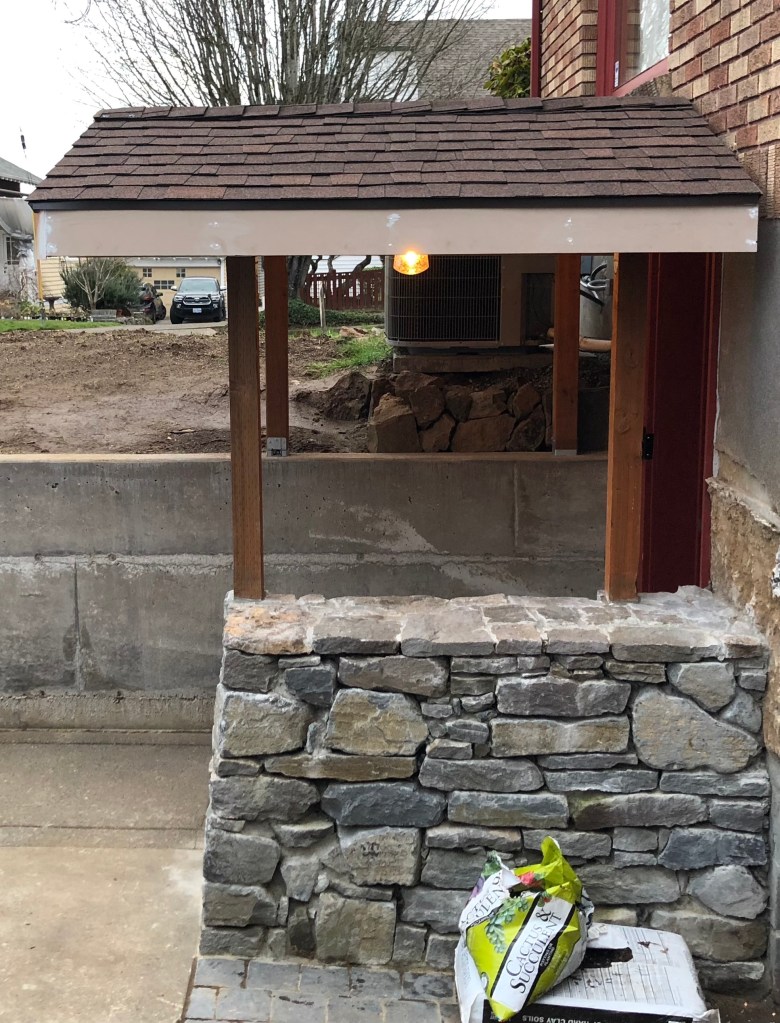
Stone wall, recently poured concrete retaining wall. Post and beam construction with 3/4 threaded rod supports across the beams. Watertight for PNW winters.
To-do’s:
wrap the posts in clear cedar
cedar tongue and groove on the ceiling
paint the fascia to match the house
foundation concrete pour (in sections) to repair the foundation wall. I’m looking forward to this because I’m going to try to create a wood pattern with the form.
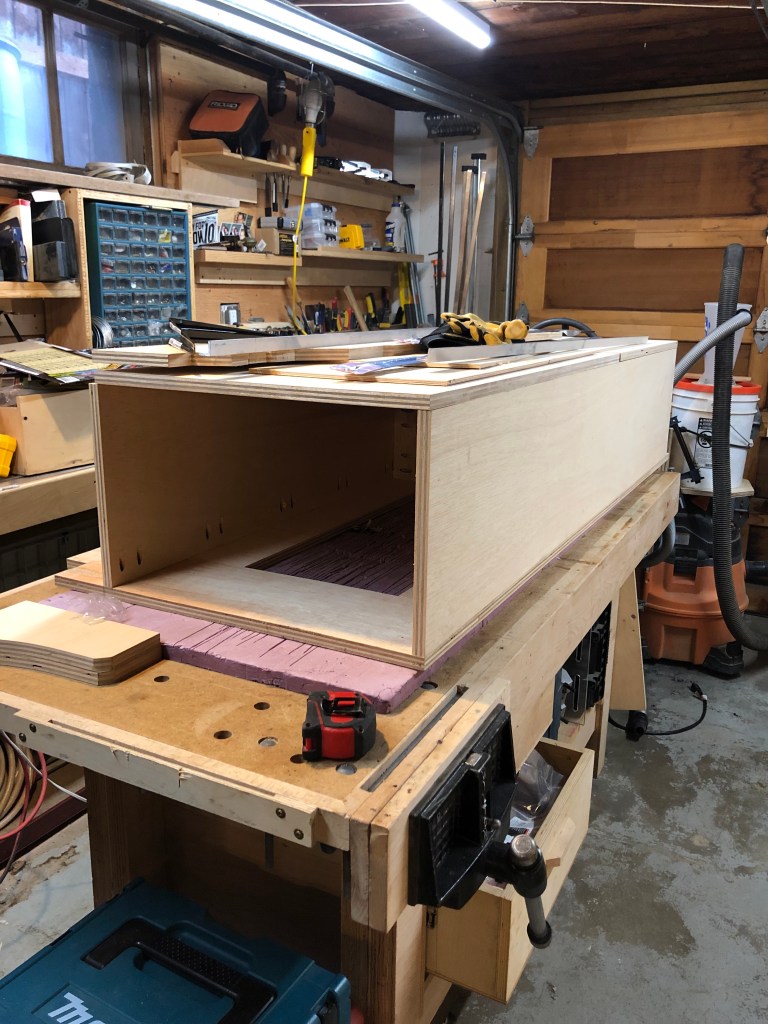
I’ve been designing and building drawers and a sleeping platform in the back of the truck as a fun little project and wanted to try to get some more organic shapes in my plywood cases – so I started to experiment with template routing. I want to have a warm, dry place to sleep for winter alpine starts in the mountains. One side of the truck bed will be a drawer on 36″ locking drawer slides, the other side is a countertop with 4 cubbies below to store things.
I have 3 routers. A small Rigid trim router that’s great for putting a radius on a corner or routing out a small area (I used it to last to create an opening for an electrical box in a portico I built), a Bosch 1617 fixed and plunge base router, and a Triton 2 1/4 horsepower router that I keep mounted in the router table. I used the Triton last to make tongue and groove from clear fir to repair a floor in our old house before we sold it last October.
I was looking forward to using a template guide from the Bosch, but when I got the tool set up and turned it on, I immediately smelled burning and realized the motor was about to catch fire. The smell of a burning electrical motor is unique – and terrible. I turned it off and on again, and realized the Bosch was dead.
The trim router isn’t powerful enough to cut a template so I had to disassemble the Triton from below the router table. It’s been mounted in the table for the last 8 years and have never used it as a handheld. I was pleasantly surprised. The Triton came with a set of template guides and centering bushing (so that the collet can be centered in the guide and the bit doesn’t spin into the guide).
Routing using a template guide is the like having a CNC machine. Using the template and accounting for the thickness of the guide (1/8″ in my case), any shape can be reproduced exactly. I found that using a track saw (I use a cordless Makita) I can plunge cut any size opening and use that as a guide for the router.
Left case that will hold a 36″ drawer. The top is on piano hinges so that with the tailgate closed I can access anything inside. Opening for the storage area around the wheel wells – driver’s side. I used 4 pieces of 1/8″ x 1″ aluminum to fabricate tabs that a lid sits on. They’re screwed in from the bottom on each side of the opening. Attached with piano hinges affording a way to open the top of the case to access anything inside. I used furniture screws and t-nuts to attach the top to the case. The drawer can be disassembled and removed when I need to do truck stuff.
As I was driving back from Mt. Hood after skiing with my daughter I realized how young our civilization is – thinking about how we’ve built the environment from raw materials, extracting resources in the simplest way possible. We build houses from dimensional lumber – 1 step away from a tree. We mix lime and cement and rock to make concrete to build roads and bridges. Our manipulation of the natural world is clumsy and basic, it leads to the ugliness you see in the built environment. In the future, my hope is that we learn to merge with the natural world, using materials at a more atomic level – to build in a simpler, more elegant way. That’s what I mean by young – we’re just infants trying to brute force our will on the world. It’s a losing strategy.